When I was planning my workbench in late 1998, I sent an email to John Gunterman asking him his opinion about the merits of the various sizes of Record face vises.
His response, in essence, was "Well, that question is good and fine, but if you're really smart the vise you want to get is Lee Valley's sliding tail vise. They've discontinued it, but if you send an email to Rob Lee maybe they can find one for you."
I took John's advice, and Robin was kind enough to indeed find me one of their last tail vises in Lee Valley's Toronto store. A few days later, it turned up on my doorstep via UPS. OBSOLETE, someone had written in marker pen on the cardboard box the vise came in.
 What's so special about this vise? At first glance it's very similar to other
tail vises, which have a metal corkscrew mechanism encased inside a wooden
box (some tail vises are entirely made of wood). But with most such vises, if
you want to open or close the vise by, say, four inches, you have to turn and
turn and turn to get there. This one, on the other hand, has a quick-release
mechanism similar to the gizmo on a Record face vise; by pulling on a ring you
can quickly slide the vise open or closed. Ergo its name.
What's so special about this vise? At first glance it's very similar to other
tail vises, which have a metal corkscrew mechanism encased inside a wooden
box (some tail vises are entirely made of wood). But with most such vises, if
you want to open or close the vise by, say, four inches, you have to turn and
turn and turn to get there. This one, on the other hand, has a quick-release
mechanism similar to the gizmo on a Record face vise; by pulling on a ring you
can quickly slide the vise open or closed. Ergo its name. Although it was a neat idea, apparently the vise didn't sell too well.
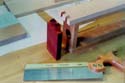
There are a few around, however. One person named "D.S." built the maple and walnut bench at
left, attaching what appears to be a fairly stock version of the sliding tail vise.
John Gunterman devotes a page to the vise
at his web site. Californian Roger Van Maren
modified his own version, making some engineering improvements and crafting a
new wooden enclosure out of beech to match his bench.
Although it was a neat idea, apparently the vise didn't sell too well.
There are a few around, however. One person named "D.S." built the maple and walnut bench at
left, attaching what appears to be a fairly stock version of the sliding tail vise.
John Gunterman devotes a page to the vise
at his web site. Californian Roger Van Maren
modified his own version, making some engineering improvements and crafting a
new wooden enclosure out of beech to match his bench.There were two reasons for me to redo mine. My own bench was going to be made out of maple, and like Roger I thought it would be nice for the vise to match. In addition, as a leftie I was going to build my bench as the mirror image of a regular righthander's bench. Although the vise comes with directions for how to swap the handedness, you end up with an unsightly slot on the top of the vise (the slot that the quick-release lever normally pokes through on the bottom).
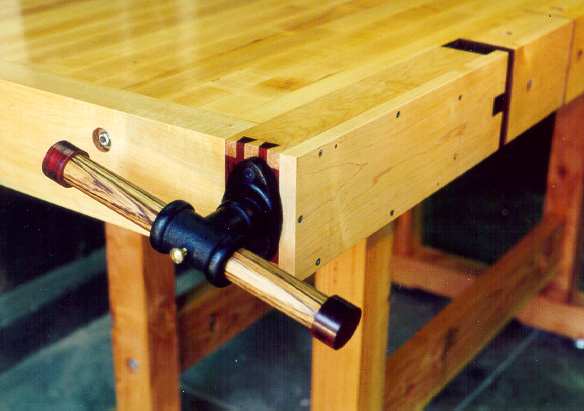
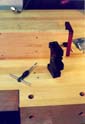
Since I was going to go to the trouble to build a new box, I figured I'd have a little fun. While most of the box was maple, I made the ends out of paduak for a nice color contrast. I also decided to throw in a few handcut dovetails to keep things interesting.
While I got the wood for the box dimensioned pretty quickly, the dovetails threw me for a whammy. I was a newbie and had never cut dovetails before! This led me on a quest to acquire some quick skills. Most of what I ended up knowing about dovetails came from Frank Klausz's video Dovetail a Drawer. I also stole a couple of ideas from Nick Engler's book Nick Engler's Woodworking Wisdom.
If I was going to cut dovetails, though, there was one other thing I was going to need -- a dovetail saw! This sent me on a quest trying various backsaws to find what worked best for me. Along the way I bought a nice dozuki from a woodworking shop on a backstreet in Tokyo, an 1860s vintage English dovetailer from a saw expert, a marginal Disston D-68 on Ebay and a cheap new Stanley at the local home center with the orange and white sign.
 What did I like best? Actually, I ended up falling for Lie-Nielsen's
version of the
Independence Tools dovetail saw. This saw was originally developed
by Pete Taran who sold the
business to Lie-Nielsen. Pete has since returned as a vendor of
vintage saws and sharpening supplies (thanks for the great D-8, Pete!).
What did I like best? Actually, I ended up falling for Lie-Nielsen's
version of the
Independence Tools dovetail saw. This saw was originally developed
by Pete Taran who sold the
business to Lie-Nielsen. Pete has since returned as a vendor of
vintage saws and sharpening supplies (thanks for the great D-8, Pete!).By virtue of cutting a few dovetails over the past months, I'd offer the following advice to fellow newbies:
1) Use sharp tools. You won't get good results with a dull or poor quality saw or chisels.
2) I found when I chiseled right on the line that, even with a sharp chisel, it would usually cut a little bit over and leave a bit of a gap in the eventual joint. As a result I now set the chisel just a hair shy of the line. I'd rather fine-tune the joint with a chisel and/or file to get a perfect fit rather than figure out how to replace wood that shouldn't have been cut away. (Though, ahem, I've done that too.)
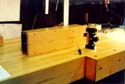 As mentioned above, Roger Van Maren made a couple of engineering
improvements when he retooled his sliding tail vise. There is a
little bit of slop between the moving metal parts inside the vise
so that it will wiggle up and down about 1/32". There is a
metal block called the dogblock that slides back and forth
on a metal plate as the vise is moved. Roger tapped threaded
holes in this block and installed nylon-tipped screws to remove the
vertical slop. He also added a couple of .010" brass shims to
remove front-to-back slop. I duplicated both of these improvements
and found that they worked great. (Of course having never tapped
a hole for a screw, I took it as an excuse to conduct a mini-excursion
into metalworking. After trying and dropping out of a machine shop
class at the local community college, I hung around one of the
Caltech machine shops long enough to not only feel like I could
tap a hole without breaking the tap, but also get a little
time on a Southbend lathe and Bridgeport vertical milling
machine. Any excuse to procrastinate!)
As mentioned above, Roger Van Maren made a couple of engineering
improvements when he retooled his sliding tail vise. There is a
little bit of slop between the moving metal parts inside the vise
so that it will wiggle up and down about 1/32". There is a
metal block called the dogblock that slides back and forth
on a metal plate as the vise is moved. Roger tapped threaded
holes in this block and installed nylon-tipped screws to remove the
vertical slop. He also added a couple of .010" brass shims to
remove front-to-back slop. I duplicated both of these improvements
and found that they worked great. (Of course having never tapped
a hole for a screw, I took it as an excuse to conduct a mini-excursion
into metalworking. After trying and dropping out of a machine shop
class at the local community college, I hung around one of the
Caltech machine shops long enough to not only feel like I could
tap a hole without breaking the tap, but also get a little
time on a Southbend lathe and Bridgeport vertical milling
machine. Any excuse to procrastinate!)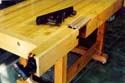 After I got the vise put together, I decided that I needed a
tarted-up handle to go with the new color scheme. So I made a
new handle out of
zebrawood, with caps of paduak. As for finishing, I went
throught the same drill as for the rest of the bench -- a few coats
of Frank Klausz's favorite bench finish
Waterlox, topped with a
homemade paste wax made from turpentine, beeswax, carnauba and
candelilla waxes.
After I got the vise put together, I decided that I needed a
tarted-up handle to go with the new color scheme. So I made a
new handle out of
zebrawood, with caps of paduak. As for finishing, I went
throught the same drill as for the rest of the bench -- a few coats
of Frank Klausz's favorite bench finish
Waterlox, topped with a
homemade paste wax made from turpentine, beeswax, carnauba and
candelilla waxes.Back to Le Bench Top Page
Back to Construction Notes